Scoring: IMPs
| ||
| ||
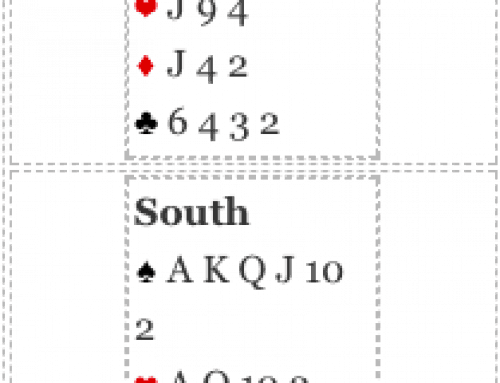
 A K Q 10
�
| East | South | West | North |
1 | 2 | Pass | 4 |
| All Pass |
�
Opening lead:� 3 You win the first spade and cash a second, partner playing the six, declarer the 10 and the 2. Now what?
Partner has the remaining spade that much is clear. Playing a third spade is playing a passive wait and see defense. This is the defense you should adopt when side suit tricks cannot get away. On this hand it is possible that club tricks might get away on dummy’s diamonds. Your best chance is to shift to a low club immediately hoping partner has either the AJ or at least the ace. If partner has the AJ, two club tricks can immediately be taken. However with the AJ of clubs and three spades, partner might have raised to 2. With the�  A without the jack and absolutely nothing else, he probably wouldn’t. A without the jack and absolutely nothing else, he probably wouldn’t.Back to the declarer. Say declarer has the KJ(x) of clubs. Which club will be play when you lead low? If you have won the first spade with the queen and then cashed the ace, declarer will assume you have 9 points in spades, and without the� As an aside, had you won the first two tricks with the king and ace of spades, partner would still know you had the queen (5 card majors) but declarer might well play West for the� Notice the lead of the� When holding three (occasionally four) small in partner’s suit that you have NOT supported, lead low to deny a doubleton. Dlr: East Vul: Both Scoring: IMPs
| ||||||||||||||||||||||

Leave A Comment